Mil Ram 1500 2013 Get to Know Guide
[x] Cancel search | Manufacturer: RAM, Model Year: 2013, Model line: 1500, Model: Ram 1500 2013Pages: 196, PDF Size: 9.66 MB
Page 128 of 196

Perform Service
• Your vehicle will require emissions maintenance at a set interval. To help remindyou when this maintenance is due, the Electronic Vehicle Information Center
(EVIC) will display “Perform Service”. When the “Perform Service” message is
displayed on the EVIC it is necessary to have the emissions maintenance
performed. Emissions maintenance may include replacing the Closed Crankcase
Ventilation (CCV) filter element, and cleaning of the EGR Cooler. The procedure for
clearing and resetting the "Perform Service" indicator message is located in the
appropriate Service Information.
Exhaust System — Regeneration Required Now
• “Exhaust System—Regeneration Required Now” will be displayed on the EVIC if the exhaust particulate filter reaches 80% of its maximum storage capacity.
Exhaust Filter XX% Full
• Indicates that the Diesel Particulate Filter (DPF) is approaching full.
Exhaust System — Regeneration in Process Exhaust Filter XX% Full
• Indicates that the Diesel Particulate Filter (DPF) is self-cleaning. Maintain your current driving condition until regeneration is completed.
Exhaust System — Regeneration Completed
•
Indicates that the Diesel Particulate Filter (DPF) self-cleaning is completed. If this
message is displayed, you will hear one chime to assist in alerting you of this condition.
Exhaust Service Required — See Dealer Now
• Regeneration has been disabled due to a system malfunction. The Powertrain control Module (PCM) will register a fault code and the instrument panel will
display the Malfunction Indicator Light (MIL).
Exhaust Filter Full — Power Reduced See Dealer
• The PCM derates the engine in order to limit the likelihood of permanent damage to the after-treatment system. If this condition is not corrected and a dealer service
is not performed, extensive exhaust after-treatment damage can occur. Have your
vehicle serviced by your local authorized dealer.
CAUTION!
See your authorized dealer, as damage to the exhaust system could occur with the
exhaust filter full.
DIESEL
126
Page 131 of 196

Adding Diesel Exhaust Fluid
• The DEF gauge (located in the instrument cluster) will display the level of DEFremaining in the tank.
NOTE:
Driving conditions (altitude, vehicle speed, load, etc.) will effect the amount of DEF
that is used in your vehicle.
NOTE:
Since DEF will begin to freeze at 12°F (-11°C), your vehicle is equipped with an
automatic DEF heating system. This allows the DEF injection system to operate
properly at temperatures below 12°F (-11°C). If your vehicle is not in operation for an
extended period of time with temperatures below 12°F (-11°C), the DEF in the tank
may freeze. If the tank is overfilled and freezes, it could be damaged. Therefore, do
not overfill the DEF tank. Extra care should be taken when filling with portable
containers to avoid overfilling. Note the level of the DEF gauge in your instrument
cluster. On pickup applications, you may safely add a maximum of 2 gallons of DEF
from portable containers when your DEF gauge is reading ½ full. On Chassis Cab
applications a maximum of 2 gallons may be added when the DEF gauge is reading
¾ full
DEF Fill Procedure
• Remove cap from DEF tank (located on drivers side of the vehicle).
• Insert DEF container into DEF tank.
• Reinstall cap onto DEF tank.
• Refer to your Owner's Manual on the DVD for further details.
CAUTION!
•To avoid DEF spillage and overfilling, do not “top off” the DEF tank after filling.•When DEF is spilled, clean the area immediately with water or a mild solvent.
DIESEL
129
Page 134 of 196

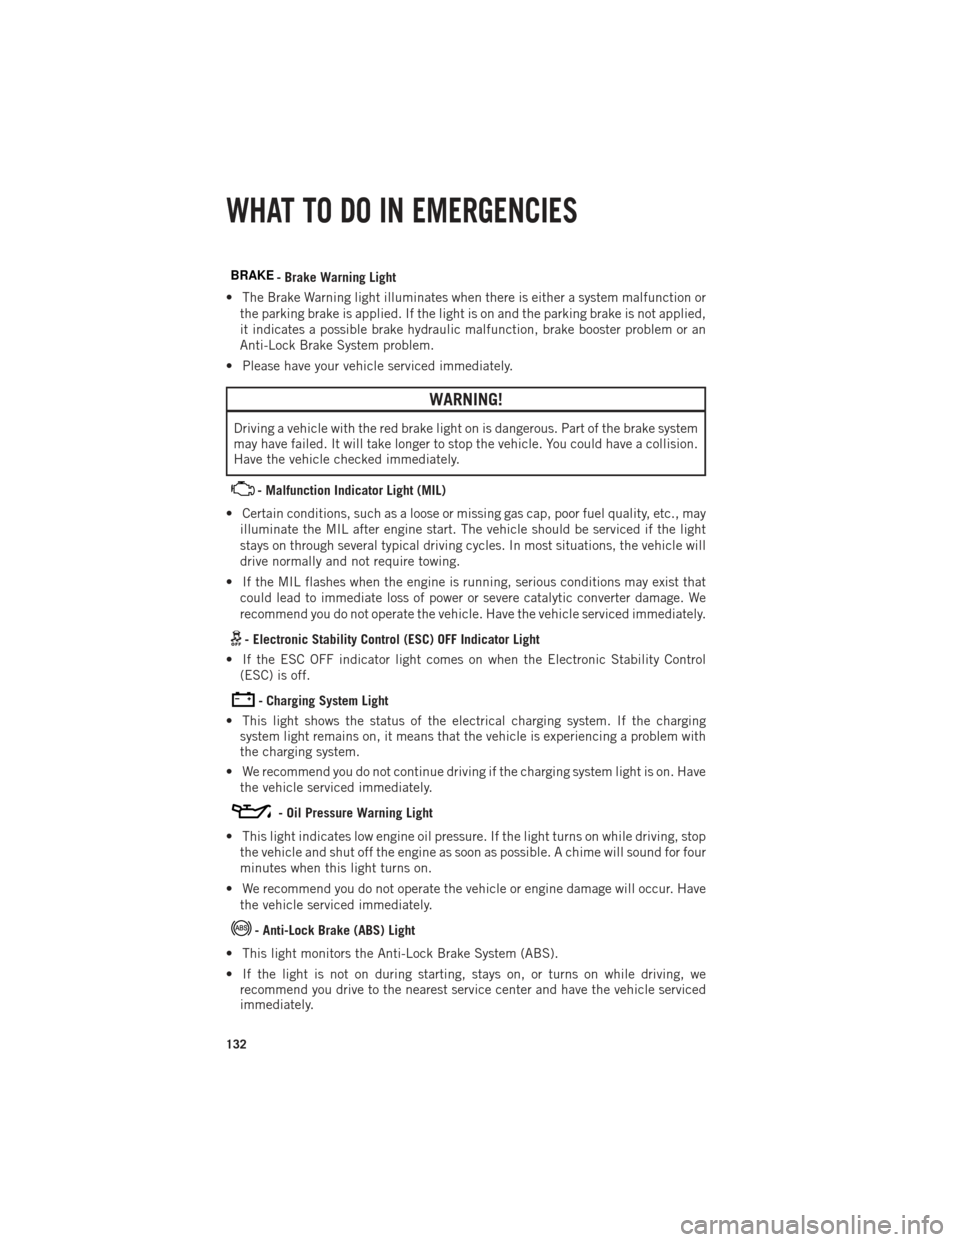
BRAKE- Brake Warning Light
• The Brake Warning light illuminates when there is either a system malfunction or the parking brake is applied. If the light is on and the parking brake is not applied,
it indicates a possible brake hydraulic malfunction, brake booster problem or an
Anti-Lock Brake System problem.
• Please have your vehicle serviced immediately.
WARNING!
Driving a vehicle with the red brake light on is dangerous. Part of the brake system
may have failed. It will take longer to stop the vehicle. You could have a collision.
Have the vehicle checked immediately.
- Malfunction Indicator Light (MIL)
• Certain conditions, such as a loose or missing gas cap, poor fuel quality, etc., may illuminate the MIL after engine start. The vehicle should be serviced if the light
stays on through several typical driving cycles. In most situations, the vehicle will
drive normally and not require towing.
• If the MIL flashes when the engine is running, serious conditions may exist that could lead to immediate loss of power or severe catalytic converter damage. We
recommend you do not operate the vehicle. Have the vehicle serviced immediately.
- Electronic Stability Control (ESC) OFF Indicator Light
• If the ESC OFF indicator light comes on when the Electronic Stability Control (ESC) is off.
- Charging System Light
• This light shows the status of the electrical charging system. If the charging system light remains on, it means that the vehicle is experiencing a problem with
the charging system.
• We recommend you do not continue driving if the charging system light is on. Have the vehicle serviced immediately.
- Oil Pressure Warning Light
• This light indicates low engine oil pressure. If the light turns on while driving, stop the vehicle and shut off the engine as soon as possible. A chime will sound for four
minutes when this light turns on.
• We recommend you do not operate the vehicle or engine damage will occur. Have the vehicle serviced immediately.
- Anti-Lock Brake (ABS) Light
• This light monitors the Anti-Lock Brake System (ABS).
• If the light is not on during starting, stays on, or turns on while driving, we recommend you drive to the nearest service center and have the vehicle serviced
immediately.
WHAT TO DO IN EMERGENCIES
132
Page 146 of 196

Hub Caps/Wheel Covers
• The hub caps must be removed before raising the vehicle off the ground.
• For single rear-wheel (SRW) models, use the blade on the end of the lug wrenchto pry the hub cap off. Insert the blade end into the pry-off notch and carefully pop
off the hub cap with a back-and-forth motion.
• On models with dual rear wheels (DRW), you must first remove the hub caps. The jack handle driver has a hook at one end that will fit in the pry off notch of the rear
hub caps. Position the hook and pull out on the ratchet firmly. The hub cap should
pop off. The wheel skins can now be removed. For the front hub cap use the blade
on the end of the lug wrench to pry the caps off. The wheel skin can now be
removed.
• You must use the flat end of the lug wrench to pry off the wheel skins. Insert the flat tip completely and using a back-and-forth motion, loosen the wheel skin.
Repeat this procedure around the tire until the skin pops off.
• Replace the wheel skins first using a rubber mallet. When replacing the hub caps, tilt the cap retainer over the lug nut bolt circle and strike the high side down with
a rubber mallet. Be sure that the hub caps and wheel skins are firmly seated
around the wheel.
Wheel Nuts
• All wheel nuts should be tightened occasionally to eliminate the possibility of wheel studs being sheared or the bolt holes in the wheels becoming elongated.
This is especially important during the first few hundred miles/kilometers of
operation to allow the wheel nuts to become properly set. All wheel nuts should
first be firmly seated against the wheel. The wheel nuts should then be tightened
to recommended torque. Tighten the wheel nuts to final torque in increments.
Progress around the bolt circle, tightening the wheel nut opposite to the wheel nut
just previously tightened until final torque is achieved. Recommended torques are
shown in the following chart.
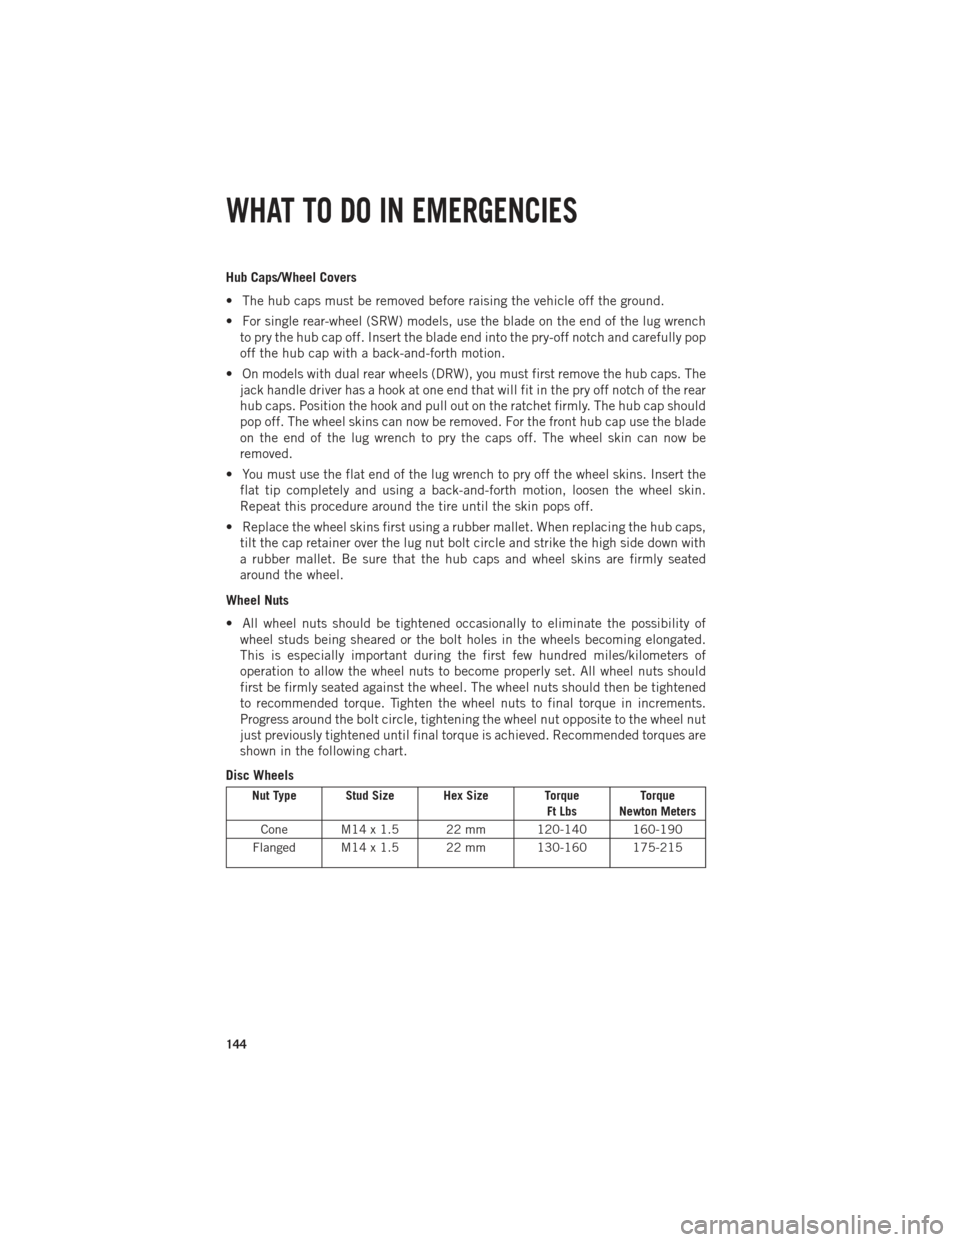
Disc Wheels
Nut Type Stud Size Hex Size Torque Ft LbsTorque
Newton Meters
Cone M14 x 1.5 22 mm 120-140 160-190
Flanged M14 x 1.5 22 mm 130-160 175-215
WHAT TO DO IN EMERGENCIES
144
Page 147 of 196

8-Stud — Dual Rear Wheels
• Dual wheels are flat-mounted and center-piloted. The lug nuts are a two-pieceassembly. When the tires are being rotated or replaced, clean these lug nuts and
add two drops of oil at the interface between the hex and the washer.
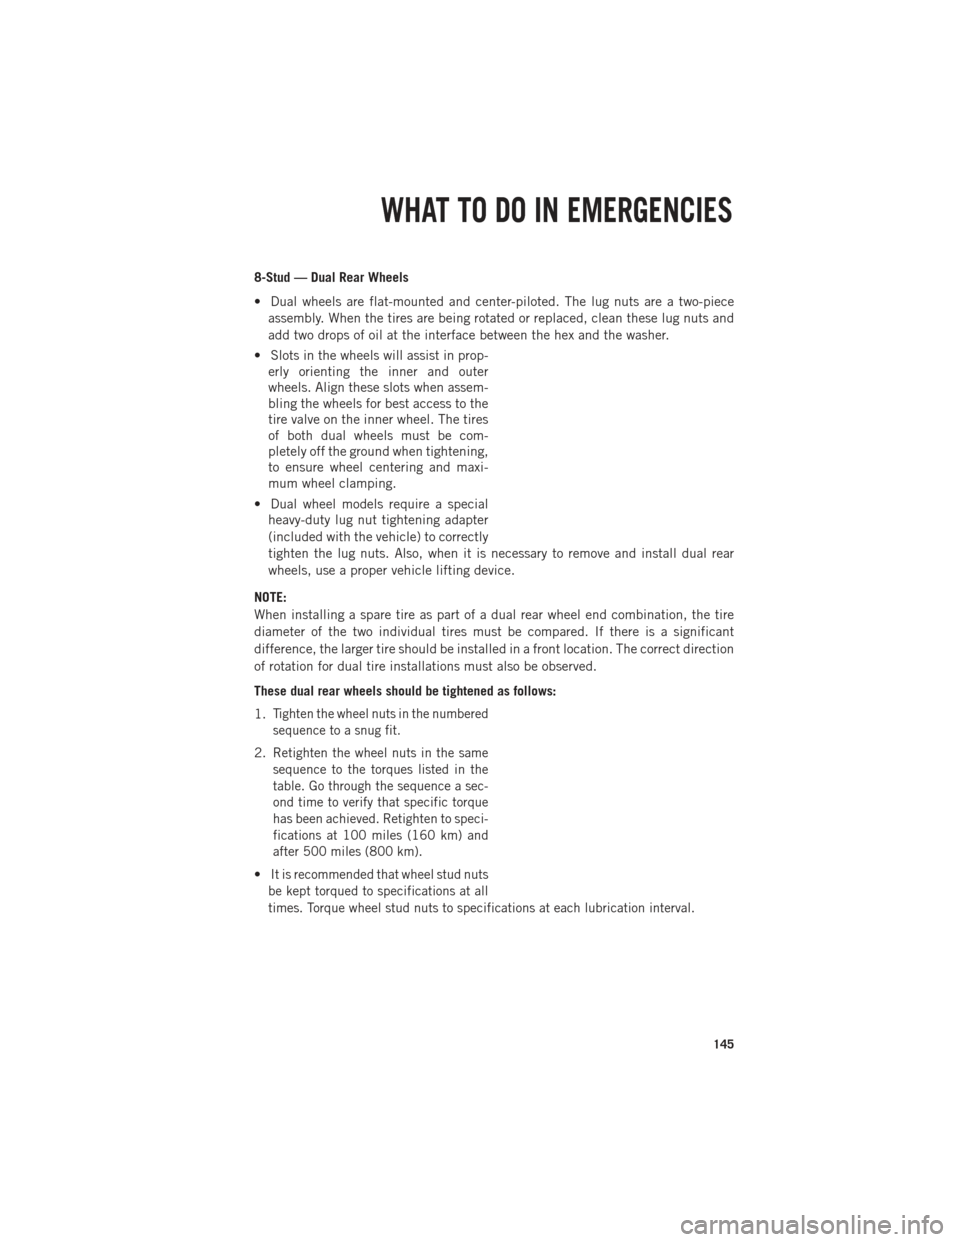
• Slots in the wheels will assist in prop- erly orienting the inner and outer
wheels. Align these slots when assem-
bling the wheels for best access to the
tire valve on the inner wheel. The tires
of both dual wheels must be com-
pletely off the ground when tightening,
to ensure wheel centering and maxi-
mum wheel clamping.
• Dual wheel models require a special heavy-duty lug nut tightening adapter
(included with the vehicle) to correctly
tighten the lug nuts. Also, when it is necessary to remove and install dual rear
wheels, use a proper vehicle lifting device.
NOTE:
When installing a spare tire as part of a dual rear wheel end combination, the tire
diameter of the two individual tires must be compared. If there is a significant
difference, the larger tire should be installed in a front location. The correct direction
of rotation for dual tire installations must also be observed.
These dual rear wheels should be tightened as follows:
1.
Tighten the wheel nuts in the numbered
sequence to a snug fit.
2.Retighten the wheel nuts in the same
sequence to the torques listed in the
table. Go through the sequence a sec-
ond time to verify that specific torque
has been achieved. Retighten to speci-
fications at 100 miles (160 km) and
after 500 miles (800 km).
•It is recommended that wheel stud nuts
be kept torqued to specifications at all
times. Torque wheel stud nuts to specifications at each lubrication interval.
WHAT TO DO IN EMERGENCIES
145
Page 153 of 196

Center Console Shifter
• Firmly set the parking brake.
•
Turn the Key Fob to the ACC or ON/RUN
position without starting the engine.
• Press and maintain firm pressure on the brake pedal.
• Using a screwdriver, press and hold the override tab through the access
port on the center console.
• Move the shift lever into the NEUTRAL position and start the vehicle.
• Release the parking brake.
MANUAL PARK RELEASE — EIGHT SPEED TRANSMISSION
• In order to push or tow the vehicle in cases where the transmission will not shift out of PARK (such as a dead battery), a Manual Park Release is available.
• Follow these steps to use the Manual Park Release: • Firmly apply the parking brake.
• Using a small screwdriver or similar tool, remove the Manual Park Release
access cover, which is just above the parking brake release handle, below and to
the left of the steering column.
WHAT TO DO IN EMERGENCIES
151
Page 154 of 196

• Using the screwdriver or similar tool, push the Manual Park Release leverlocking tab (just below the middle of the lever) to the right.
• While holding the locking tab in the disengaged position, pull the tether
strap to rotate the lever rearward,
until it locks in place pointing to-
wards the driver's seat. Release the
locking tab and verify that the
Manual Park Release lever is locked
in the released position.
• The vehicle is now out of PARK and can be towed. Release the parking
brake only when the vehicle is se-
curely connected to a tow vehicle.
To Reset The Manual Park Release:
• Push the locking tab to the right, to unlock the lever.
• Rotate the Manual Park Release lever forward to its original position, until
the locking tab snaps into place to
secure the lever.
• Pull gently on the tether strap to con- firm that the lever is locked in its
stowed position.
• Re-install the access cover.
WARNING!
Always secure your vehicle by fully applying the parking brake, before activating
the Manual Park Release. Activating the Manual Park Release will allow your
vehicle to roll away if it is not secured by the parking brake or by proper connection
to a tow vehicle. Activating the Manual Park Release on an unsecured vehicle
could lead to serious injury or death for those in or around the vehicle.
WHAT TO DO IN EMERGENCIES
152
Page 155 of 196

TOWING A DISABLED VEHICLE
Towing Condition Wheels OFF the Ground2WD Models4WD Models
Flat Tow NONEIf transmission is operable:
• Transmission in NEUTRAL
• 30 mph (48 km/h) max
• 15 miles (24 km) maxdistance •
Auto Transmission in PARK
• Manual Transmission in gear
(NOT NEUTRAL)
• Transfer Case in NEUTRAL
• Tow in FORWARD direction
Wheel Lift or Dolly Tow Front
NOT ALLOWED
Rear OK
NOT ALLOWED
Flatbed ALL
BEST METHOD BEST METHOD
WHAT TO DO IN EMERGENCIES
153
Page 164 of 196

FLUIDS AND CAPACITIES
Gasoline Versions
Component Fluid, Lubricant, or Genuine Part Capacities
Engine Coolant
3.6L, 4.7L Engine We recommend you use MOPAR®
Antifreeze/Coolant 10 Year/
150,000 Mile Formula OAT
(Organic Additive Technology). 14 Quarts (13 Liters)
Engine Coolant
5.7L 1500 Models We recommend you use MOPAR
®
Antifreeze/Coolant 10 Year/
150,000 Mile Formula OAT
(Organic Additive Technology). 16 Quarts (15 Liters)
Engine Coolant
5.7L 2500/3500 Models We recommend you use MOPAR
®
Antifreeze/Coolant 10 Year/
150,000 Mile Formula OAT
(Organic Additive Technology) .18.7 Quarts (17.7 Liters)
Engine Coolant
5.7L 2500/3500
Models w/Heavy Duty We recommend you use MOPAR®
Antifreeze/Coolant 10 Year/
150,000 Mile Formula OAT
(Organic Additive Technology) .19.2 Quarts (18.2 Liters)
Engine Oil with Filter 3.6L, 4.7L, 5.7L We recommend you use
API certified 5W-20 engine oil, meeting the requirements ofChrysler Material Standard
MS-6395. Refer to you oil filler cap for correct SAE grade. 3.6L Engine - 6 Quarts
(5.7 Liters)
4.7L Engine - 6 Quarts (5.7 Liters)
5.7L Engine - 7 Quarts (6.6 Liters)
Engine Oil with Filter 5.7L
For 2500/3500 trucksoperating with a gross combined weight
rating greater than
14,000 lbs/(6,350 kg)
We recommend you use
API Certified SAE 5W-30 engine oil, meeting the requirements of Chrysler Material Standard
MS-6395. Refer to your engine oil filter cap for correct SAE grade. 5.7L Engine - 7 Quarts
(6.6 Liters)
Engine Oil Filter
3.6L, 4.7L, 5.7L We recommend you use MOPAR
®
Engine Oil Filters.
—
Spark Plug 3.6L We recommend you use MOPAR®
Spark Plugs. —
Spark Plug 4.7L We recommend you use MOPAR®
Spark Plugs. —
Spark Plug 5.7L We recommend you use MOPAR®
Spark Plugs. —
Automatic
Transmission —
Eight-Speed AutomaticWe recommend you use Mopar®
ZF 8&9 Speed ATF™ Automatic Transmission Fluid. —
MAINTAINING YOUR VEHICLE
162
Page 166 of 196

Component Fluid, Lubricant, or Genuine Part Capacities
Fuel Selection 5.7L 87 Octane Acceptable. 89 Octane Recommended. 1500 Regular
Cab Shortbed/Crew Quad Cab - 26 Gallons
(98 Liters) (Approxi-
mate) 1500 Regular
Cab Longbed/Crew Quad Cab (Optional) -
32 Gallons (121 Liters) (Approximate)
2500/3500 Shortbed -
34 Gallons (129 Liters) (Approximate)
2500/3500 Longbed -
35 Gallons (132 Liters) (Approximate)
Diesel Versions
Component Fluid, Lubricant, or Genuine Part Capacities
Engine Coolant
6.7L Turbo Diesel Engine We recommend you use MOPAR®
Antifreeze/Coolant Ten Year/
150,000 Mile Formula OAT
(Organic Additive Technology). 5.7 Gallons (21.4 Liters)
Engine Oil with Filter
6.7L Turbo Diesel EngineIn ambient temperatures below
0°F (-18°C), We recommend you use 5W-40 synthetic engine oil that meets Chrysler MaterialsStandard MS-10902 and the
API CJ-4 engine oil category is
required. In ambient temperatures above 0°F (-18°C), We recom-
mend you use 15W-40 engine oil that meets Chrysler MaterialsStandard MS-10902 and the API CJ-4 engine oil category is required. 12 Quarts (11.4 Liters)
MAINTAINING YOUR VEHICLE
164